
Magento is a flexible eCommerce platform that allows you to manage multiple stores and frontends from a single Dashboard. A single installation can be configured as such so that multiple subdomains are spread out among multiple stores but managed singularly and can even share common product catalogs, customers and settings, depending on the setup!
Before We Begin
First thing’s first, we need to have a clear understanding on your options on how the stores should be addressed – the URL layouts for your setup. There are 3 approaches:
- Domains: e.g. www.store1.com and www.store2.com
- Subdomains: e.g. store1.website.com and store2.website.com
- Folders: e.g. www.website.com/store1/ and www.website.com/store2/
This tutorial will cover #2, Subdomains and will detail how to set-up a multi-store Magento installation with Subdomains.
For the set-up, make sure that the prerequisites below are met:
- Magento must already be installed and on the root of a domain (www.example.com, not www.example.com/magentofolder)
- Access to add new vHosts (virtual hosts). If the hosting server has cPanel, it is already supported.
Alright, are both conditions checked? Good, now let’s get started!
1. Server Configuration
- Log into the server’s cPanel and open Subdomains.
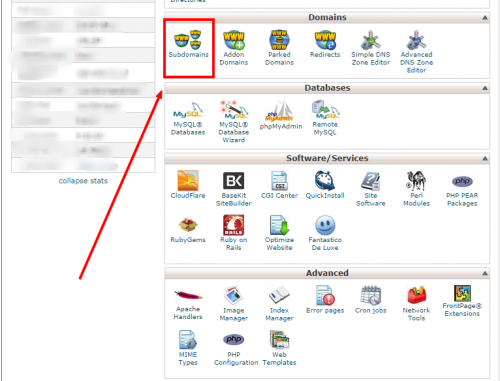
- Fill in the Subdomain’s name for the selected domain and make sure to set the Document Root to /public_html/. Click Create.

- Repeat Step 2 depending on the number of subdomains needed.
2. Creating a new Magento Store
2a. Creating Store Categories
If you want your websites to share the same catalog and categories you can skip this step.
- Log into your Magento Dashboard
- Click on Catalog » Manage Categories

- Click on Add Root Category
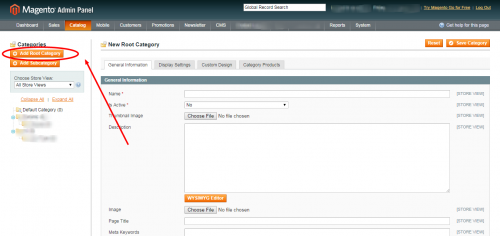
- Enter a name for the new category and make sure Is Active is set to YES

- Click on the Display Settings tab and set Is Anchor to True. This will show products listed in sub categories, and also enable product filtering for the category.

- Click Save Category near the upper-right corner.
2b. Configuring the Stores
Before we start configuring our stores, lets pause for a minute and explain the concepts of Websites, Stores, and Store Views in Magento. Websites are the top-most entity in Magento. If you want completely separate sites that do not share cart, shipping methods, etc., you should create separate Websites. Each Website has at least one Store, and each Store has at least one Store View. Multiple Stores can share cart, user sessions, payment gateways, etc., but have their own catalog structure. Finally, a Store is a collection of Store Views. Store Views change the way pages are presented, normally used to offer a site in different layouts or languages.
- On Magento’s Dashboard, go to System » Manage Stores

- Click Create Store.

- Enter the following:
- Name – enter a name for the store;
- Root Category – select the category you created in the previous step.
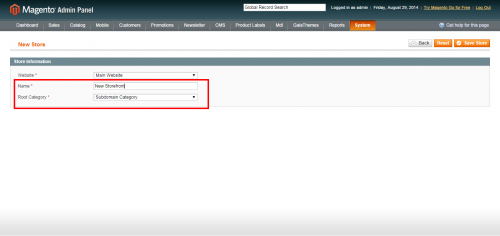
- Click Save Store when finished
- Note our newly-added store on the list. Click Create Store View.
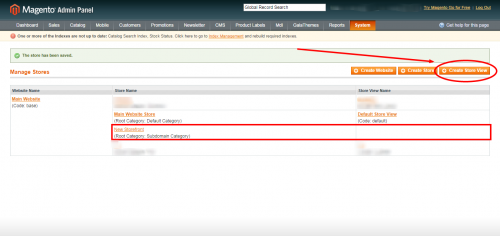
- Enter the following:
- Store – select the store you created in the previous step
- Name – enter a name for the store view
- Code – enter a unique identifier for this store view
Make a note of this code as you will need it later! - Set Status to Enabled
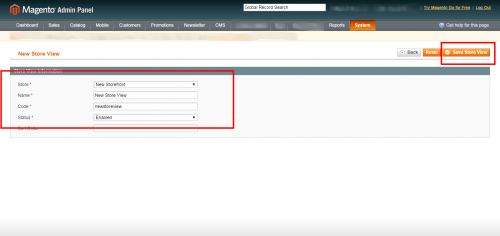
- Click Save Store VIew when finished.
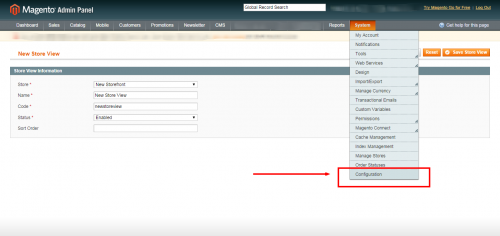
- Now, go to System > Configuration
- Make sure Default Config is selected as the Current Configuration Scope. Open the Web tab under General on the left sidebar of the page and open the URL Options section. Set Auto-redirect to Base URL to No.
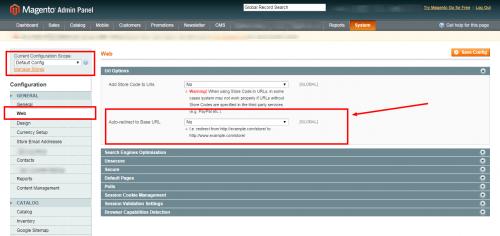
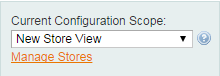
- Now, change the Current Configuration Scope dropdown to your newly created website (in this case, New Store View)
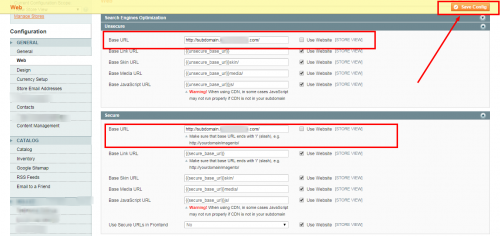
- Under the Web section, we now need to change the Secure Base URL and Unsecure Base URL settings. Uncheck the Use Default [STORE VIEW], and replace the URLs with your corresponding domain name. Remember to include the trailing /. Click Save Config when finished.
This completes the configuration of the new store. Repeat the steps above for every additional Store (subdomain) you want to add.
3. Mapping the domain on .htaccess
Now that we have added new Subdomains on the server and created new Stores inside Magento, it’s time to bring them together and map the correct Store to each Subdomain.
- Open the .htaccess file located on the root folder of your server (/public_html/) where Magento is installed. Make sure to check Show Hidden Files (dotfiles) when opening cPanel’s File Manager or use Adobe Dreamweaver or a similar editor.
- Add these lines on the bottom of the file (replace them with actual domain names)
[php]
SetEnvIf Host www.subdomain.yourdomain.com MAGE_RUN_CODE=newstoreview
SetEnvIf Host www.subdomain.yourdomain.com MAGE_RUN_TYPE=store
SetEnvIf Host ^subdomain.yourdomain.com MAGE_RUN_CODE=newstoreview
SetEnvIf Host ^subdomain.yourdomain.com MAGE_RUN_TYPE=store
[/php]- MAGE_RUN_CODE – this is the unique code chosen when you created the Magento Store View
- MAGE_RUN_TYPE – depending on whether you want to load a specific Website or Store View; set it to website or store, respectively. In our case, we will set them to store as we have set them the subdomains as such.
- Add an entry for each additional subdomain set up.
- Save the .htaccess file.
Now navigate to you new site and verify that the correct Magento store is loaded. If not, make sure that the the MAGE_RUN_CODE match the one created earlier and that the domain resolves to the correct folder/path.
You should now be able to see each respective store by browsing the URL.
Thank you for reading this tutorial!
1 Comment